To introduce tolerance and measurement in manufacturing, we'll be releasing a series of articles exploring geometric and positional tolerancing, annotation methods, dimensional and geometric tolerances, GD&T technical standards and specifications, and sharing the application of blue-light 3D scanning technology in tolerance analysis.
This article will provide you with relevant information to help you understand the following:
The definition and impact of dimensional tolerances, dimensional tolerance notation methods, dimensional tolerances and fits, and fit control.
Dimensional tolerances and fits are crucial in the manufacturing process. They directly impact part interchangeability and smooth assembly. Let's take a deeper look at these concepts and their importance to manufacturing.
Dimensional Tolerance: Definition and Impact
Dimensional tolerance is the allowable range of dimensional variation during the manufacturing process, ensuring part fit and functionality. Appropriate dimensional tolerances directly impact part interchangeability and smooth assembly.
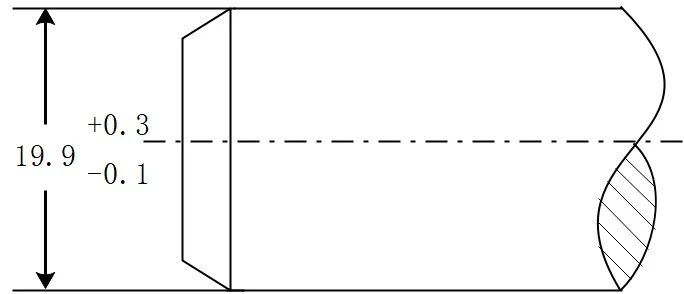
Figure 1 illustrates a common dimensional tolerance notation for a shaft. +0.3 represents the upper limit deviation, resulting in a maximum dimension of 20.2. -0.1 represents the lower limit deviation, resulting in a minimum dimension of 19.8. The dimensional tolerance is +0.4.
Figure 1 Example of dimension tolerance marking
Dimensional tolerance expression method
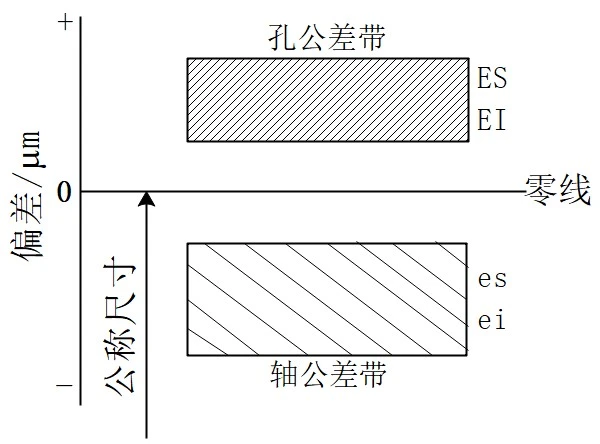
In engineering, tolerance zone diagrams are used to more intuitively express dimensional tolerances. These diagrams consist of a zero line and a dimensional tolerance zone. Figure 2 shows a common diagram of a dimensional tolerance zone.
Figure 2 Schematic diagram of tolerance zone
Dimensional tolerances and fits
Different types of fits (clearance fit, interference fit, and transition fit) directly determine the tightness and fit between parts. A proper fit ensures the proper function of the parts.

Figure 3 Clearance fit tolerance zone
1) Clearance fit
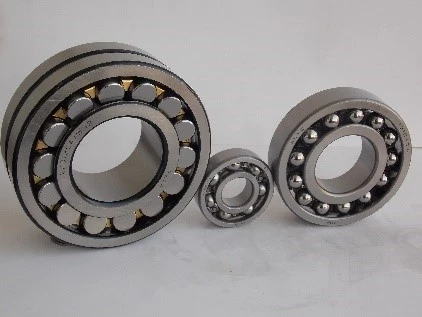
A clearance fit is typically used when relatively loose fit requirements exist, when a certain amount of relative motion needs to be allowed, or when ease of installation and disassembly is required. For example, in a mechanical assembly, the fit between a bearing and a ball bearing, as shown in Figure 4, requires appropriate clearance if the shaft is required to rotate or move within the hole.
Figure 4 Clearance fit example
2) Interference fit
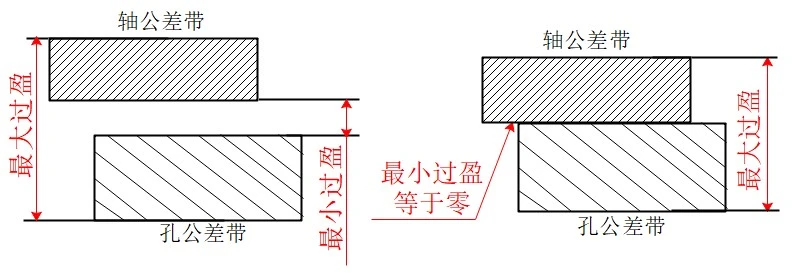
A fit with interference (including zero interference) is called an interference fit, and the interference fit tolerance zone is shown in Figure 5.
Figure 5 Interference fit tolerance zone
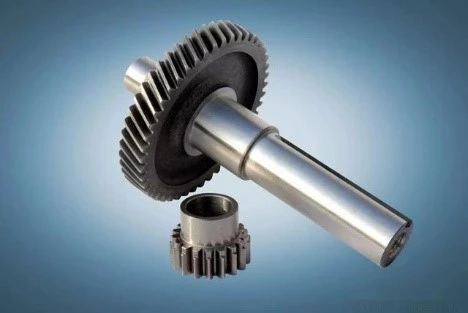
Interference fits are typically used to ensure a tight connection between parts, especially where strong fixation or torque transmission is required. For example, the fit between a shaft and a sleeve in a mechanical assembly, as shown in Figure 6, requires an interference fit if no relative movement under load is required.
Figure 6 Interference fit example
3) Transition coordination
The fit that may have clearance or interference (for a large number of parts) is called transition fit. The tolerance zone of transition fit is shown in Figure 7.
Figure 7 Transition fit tolerance zone
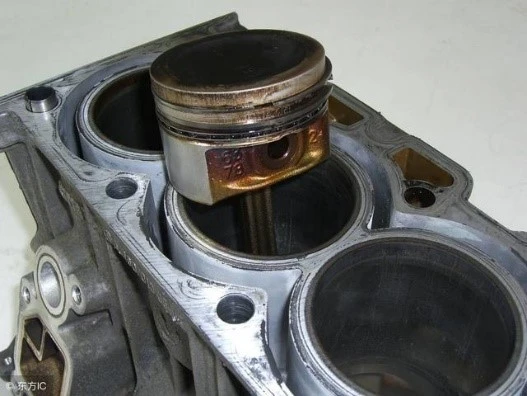
A transition fit is typically used when relative stability is required while also allowing for some degree of disassembly or adjustment. This fit offers a balance between firmness and convenience. For example, the fit between an automobile piston and cylinder liner is a typical example of a transition fit, as shown in Figure 8. There needs to be a certain clearance between the piston and cylinder liner to ensure free movement within the cylinder, while also maintaining a tightness to prevent compressed gas leakage.
Figure 8 Transition fit example
Cooperative system
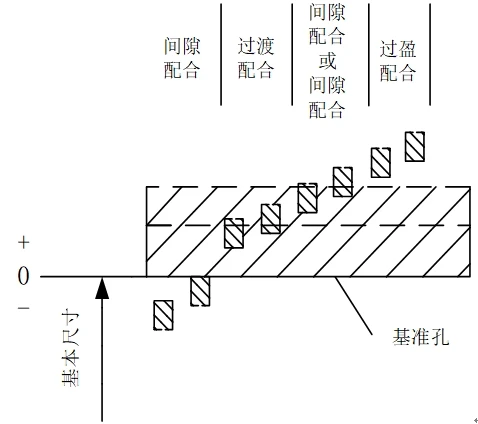
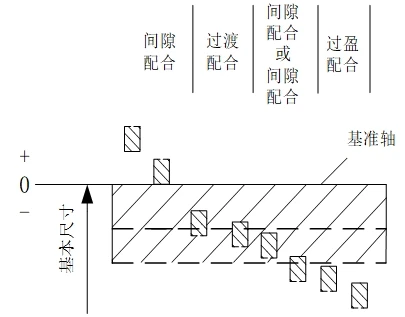
A fit system is a system of fits between holes and shafts with the same extreme limits, also known as a base system. GB/T 1800.1-1997 specifies two parallel fit systems: hole-based fit and shaft-based fit.
1) Hole-based system
It refers to a system in which the tolerance zone of a hole with a certain basic deviation forms various fits with the tolerance zone of a shaft with different basic deviations, as shown in Figure 9.
Figure 9 Hole-based fit
2) Base axis system
The basic shaft system is a system in which the tolerance zone of a shaft with a certain basic deviation forms various fits with the tolerance zone of a hole with different basic deviations, as shown in Figure 10.
Figure 10 Basic shaft system fit
Conclusion
Dimensional tolerances and fits are essential factors in the manufacturing process, directly impacting product quality and assembly feasibility. A thorough understanding of these concepts is crucial for improving manufacturing efficiency and product quality.
We hope this article helps you better understand the importance of dimensional tolerances and fits.

